Dev Blog 4: Procedural Map Generation
Generating 2D landscapes with numbers!
3/9/20
Note: The A4Engine game engine and extended TMX map format, both developed by Prof. Santiago Ontañón, were used for playing the maps generated by my program. Further documentation can be found here.
This project was another assignment from my Game AI course:
Implement a procedural map generator that creates playable maps for the A4Engine. It can generate dungeons, outdoors maps (with grass, rivers, trees, rocks, paths, etc.), or interiors - it’s up to you. It must adhere to the TMX map format.
Most of my friends generated dungeons with their solutions, using the Kruskal algorithm to generate maze-like environments (this approach was suggested by the professor). I wanted to try something different, so I went about generating a outdoor landscape environment. We could also use whatever language we wanted; I chose C++, as I wanted to get more experience with it before I enter the industry.
My plan was to generate a 2D heightmap - a grid of numbers between 0 and 1 that represent the height at each tile of my landscape. Once I could generate that, I’d determine some altitude to be the water level; every tile with a height above that level would be land, and everything below would be water.
I wasn’t sure what would come next, but I knew that’d be enough to start generating some basic environments.
Step 1: Generate the Heightmap
To be clear, I didn’t plan on having any actual verticality in the maps generated! I was just combining a heightmap and a water level to create an insteresting arrangement of land and water.
Take something like this… and turn it into something like this:

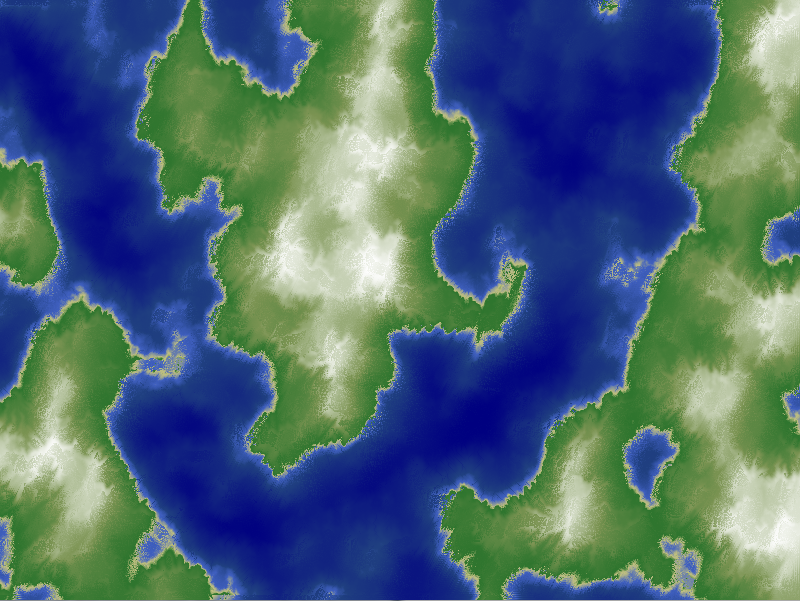
Note: my maps are generated at a much lower resolution - think Final Fantasy or Pokemon
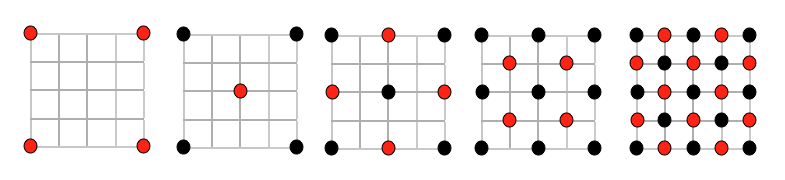
I used the diamond-square algorithm to generate the heightmaps. It starts with intial height values in the corners and iteratively performs “Diamond” and “Square” averaging operations, gradually calculating the height value for each position in the grid. Every Diamond and Square operation applies a bit of “noise” so we don’t get boring, perfectly-smooth maps.
This limited me to square-shaped maps, but I didn’t have a problem with that.
Explained for normal humans
If none of that made sense to you, don’t worry! It’s a tough algorithm to grasp at first, and it took me a while to fully get it too. I’ll explain it with an analogy:
Imagine you’re making a blanket fort. Cozy!

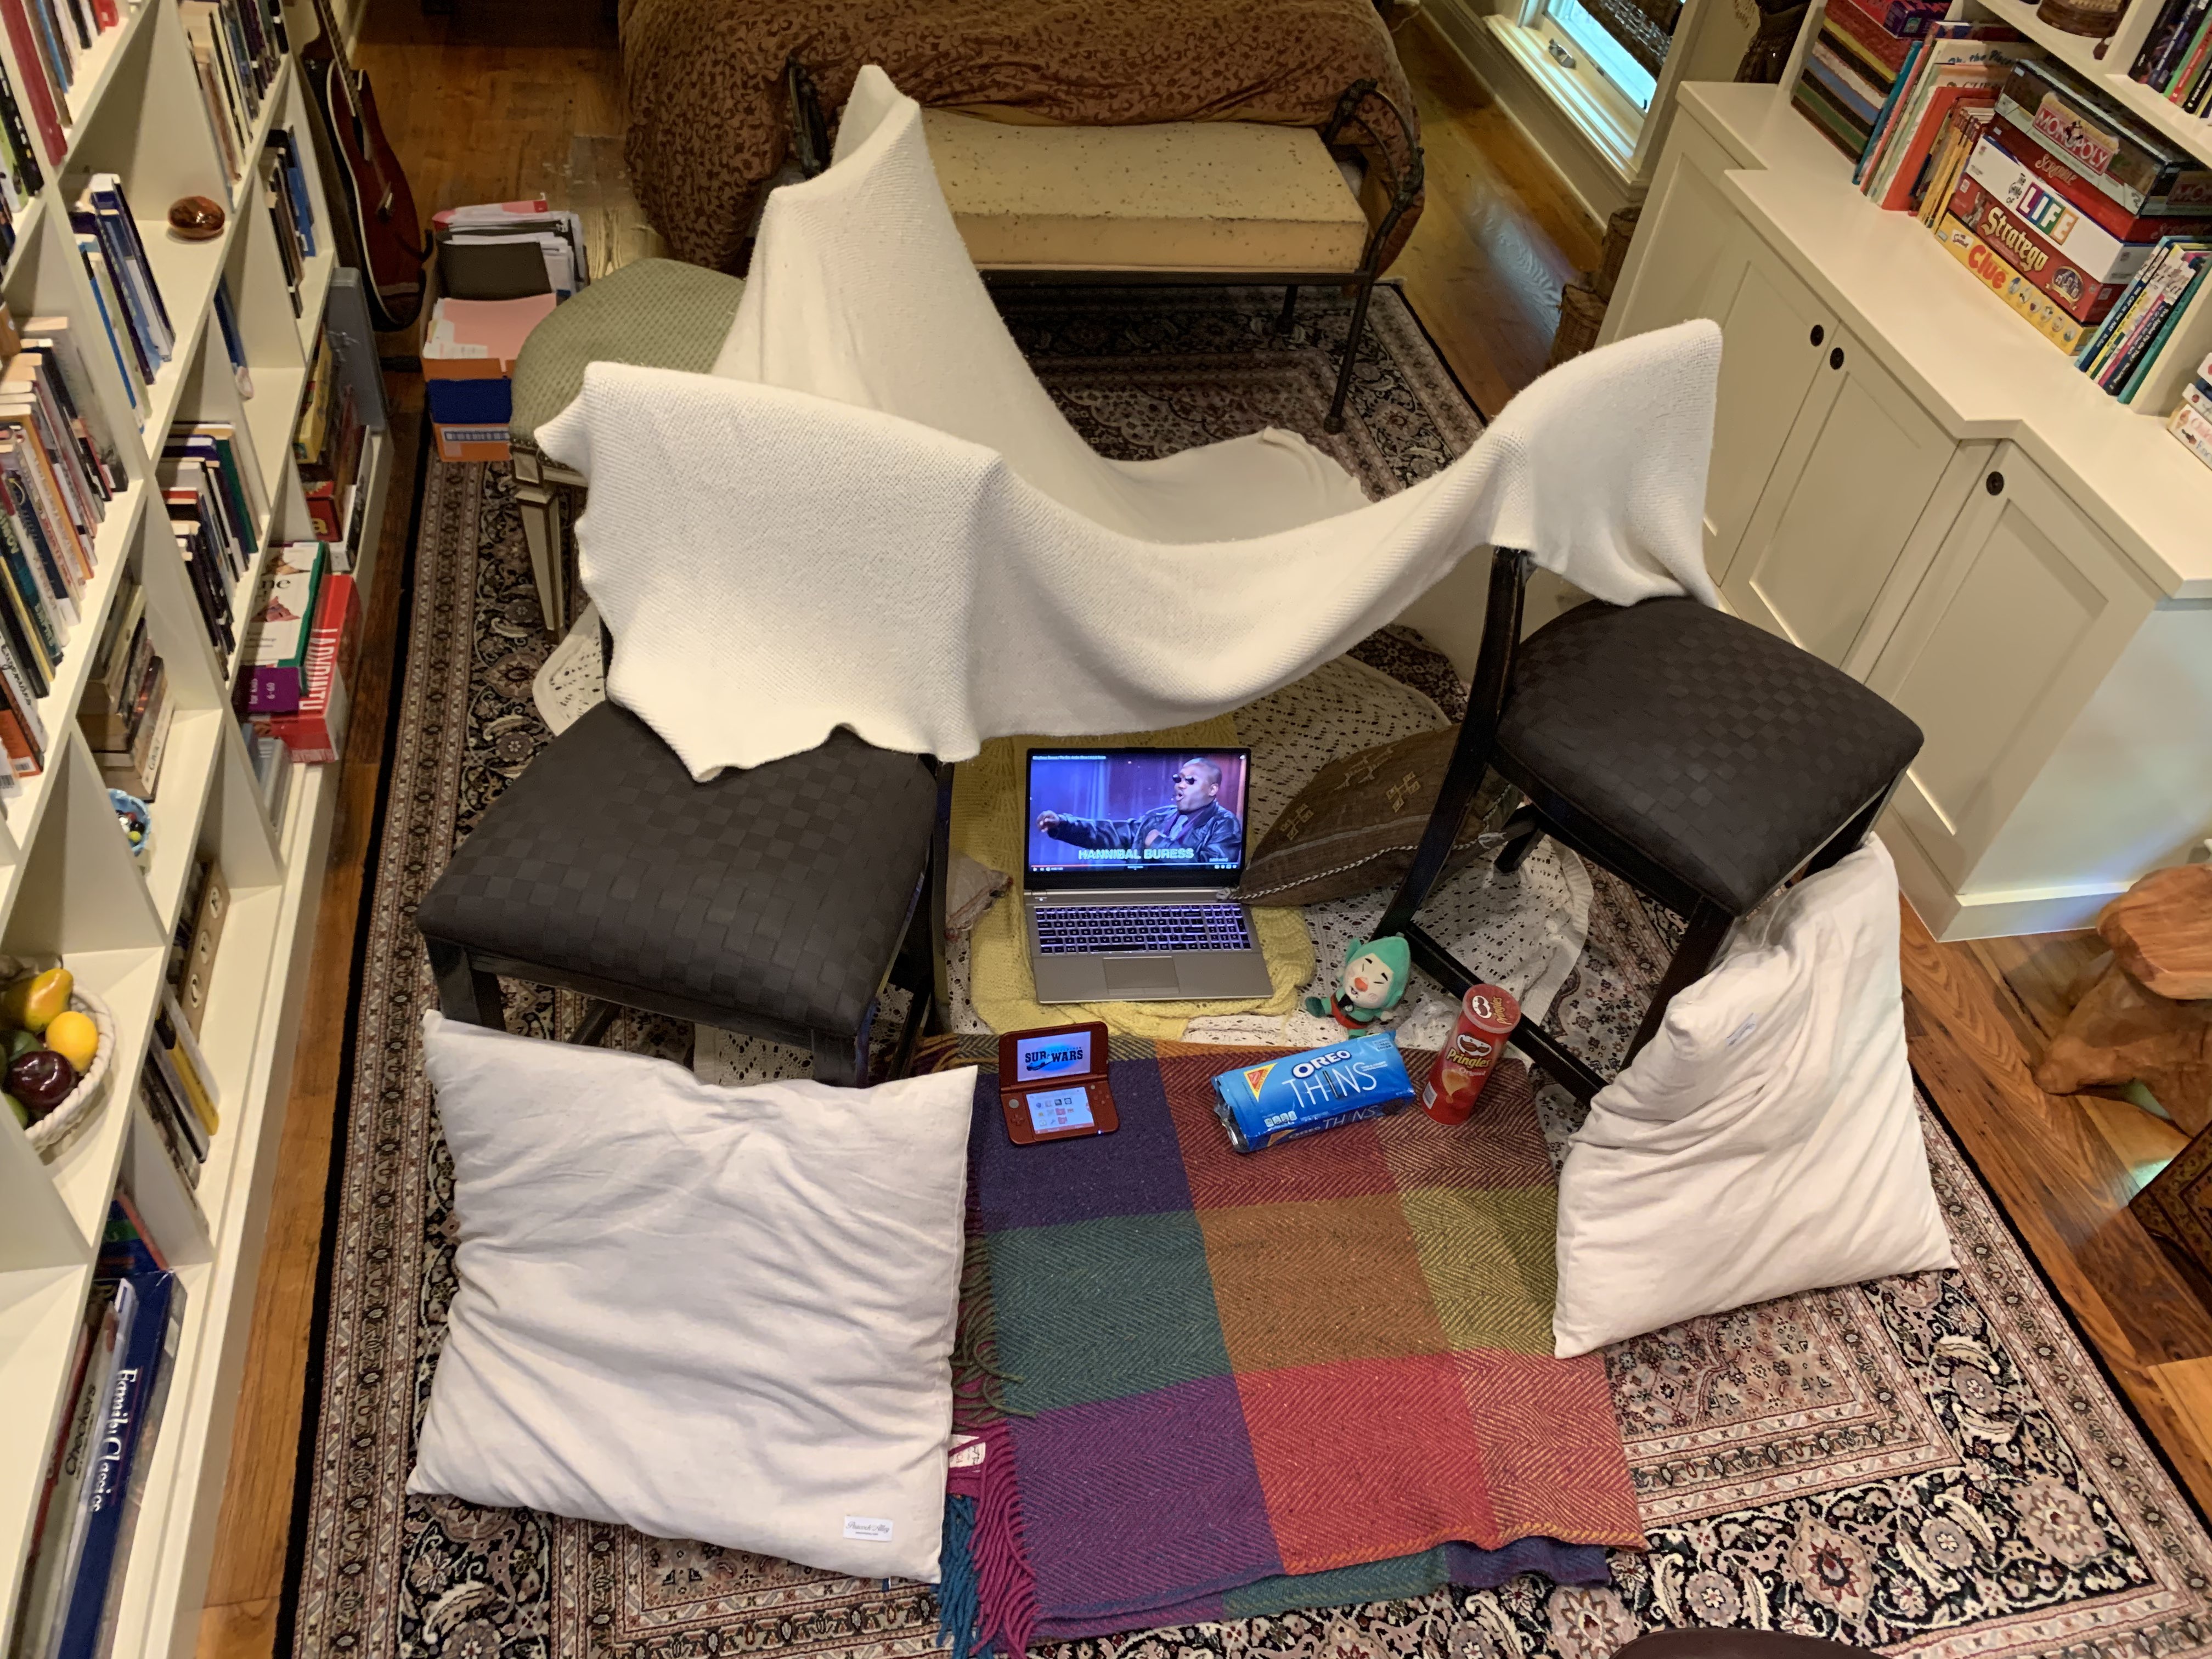
I wasn't happy with the image search results, so I made my own!
You have 4 chairs, one to place in each corner of the fort so the blanket forms a nice roof over you. Once you throw the blanket over, you don’t have a lot of control over how much the blanket droops down near the center, but you can raise/lower the chairs to indirectly change the shape of the blanket. Maybe you want one end of the fort to be taller than the other, so you put some books under the 2 chairs holding up that end.
The analogy is this: we set up the chairs in the corners, and throwing the blanket over top is what the Diamond Square algorithm does. The shape of the blanket (i.e. our landscape) is represented by the heightmap we get out of it.
Anyway, back to the technical stuff.
So before running the algorithm, I’d start with a heightmap with preset corner values:
0.22    0.00    0.00    0.00    0.00    0.00    0.00    0.00    0.09

0.00    0.00    0.00    0.00    0.00    0.00    0.00    0.00    0.00

0.00    0.00    0.00    0.00    0.00    0.00    0.00    0.00    0.00

0.00    0.00    0.00    0.00    0.00    0.00    0.00    0.00    0.00

0.00    0.00    0.00    0.00    0.00    0.00    0.00    0.00    0.00

0.00    0.00    0.00    0.00    0.00    0.00    0.00    0.00    0.00

0.00    0.00    0.00    0.00    0.00    0.00    0.00    0.00    0.00

0.00    0.00    0.00    0.00    0.00    0.00    0.00    0.00    0.00

0.32    0.00    0.00    0.00    0.00    0.00    0.00    0.00    0.60
And the diamond-square algorithm populates the rest of the map:
0.22    0.24    0.24    0.24    0.22    0.21    0.19    0.16    0.09

0.25    0.26    0.22    0.24    0.21    0.23    0.18    0.20    0.18

0.28    0.23    0.13    0.17    0.12    0.16    0.11    0.21    0.24

0.29    0.25    0.16    0.17    0.14    0.17    0.17    0.26    0.29

0.32    0.24    0.11    0.14    0.09    0.15    0.11    0.27    0.36

0.31    0.27    0.18    0.21    0.16    0.24    0.21    0.34    0.40

0.32    0.25    0.12    0.18    0.11    0.20    0.15    0.36    0.48

0.31    0.28    0.26    0.26    0.28    0.30    0.35    0.43    0.51

0.32    0.33    0.36    0.36    0.43    0.42    0.49    0.51    0.60
This was nice because I could control the types of maps being generated by specifying certain corner values. For example, if I want a valley running from the top-right to the bottom-left of the map, I’d set low values in those corners, and high values in the top-left/bottom-right corners.
Step 2: Calculate the Water Level
My first inclination here was to set a fixed water level to be used on all maps generated. I figured that, if I was generating random height values between 0 and 1, I could set a fixed water level and it’d result in roughly a proportional ratio of water to land (ex. water level of .15 = 15% of tiles are water). So I plugged in a water level of .15:

Hmm, that’s much more water than I expected, but maybe that was an unlucky seed. Let’s try a few more maps.


Maybe I should try a lower water level? I’ll plug in .05 and see what we get:


We’re not getting very consistent results here, and procedural generation is only useful when you can effectively control the content being generated. This step ended up being a bit more involved than I’d anticipated.
I ended up determining a water level for the heightmap generated by calculating the average altitude and multiplying it by some WATER_RATIO value between 0 and 1. Let’s see what we get with a water ratio of 0.55:


That’s much better! But there’s still a lot left to improve here.
Step 3: Clean-up Pass
From here on out, I’m going to pick one map seed to use in my screenshots. This should give a better idea of the gradual improvements.
You’ve probably noticed all those single-tile patches of land/water on the maps generated. This is what happens when you apply a cut-off water level to the jagged landscapes we’re generating. Now that I’m done generating the landscape, the rest of our work is going to be clean-up and decoration, so I created a TerrainPass class to handle those changes.
I decided to iterate over all tiles (inefficient, but performance isn’t a priority), and remove any that have no adjacent tiles of the same type.
// Clean up any land/water patches around map
terrainPass.CleanUpPatches(terrainLayer, LAND_TILE, WATER_TILE);
terrainPass.CleanUpPatches(terrainLayer, WATER_TILE, LAND_TILE);

void TerrainPass::CleanUpPatches(TileMap* tilemap, int find_tile, int replace_tile)
{
	// Iterate over each tile
	for (int y = 0; y < tilemap->size; y++) {
		for (int x = 0; x < tilemap->size; x++) {
			int tile = tilemap->GetTileAt(x, y);

			// Skip if tile isn't specified type
			if (tile != find_tile)
				continue;

			// If tile has less than 2 neighbors of same type, replace with replace_tile
			if (CountNeighborsOfType(x, y, tilemap, find_tile) < 1) {
				tilemap->SetTileAt(x, y, replace_tile);
			}
		}
	}
}
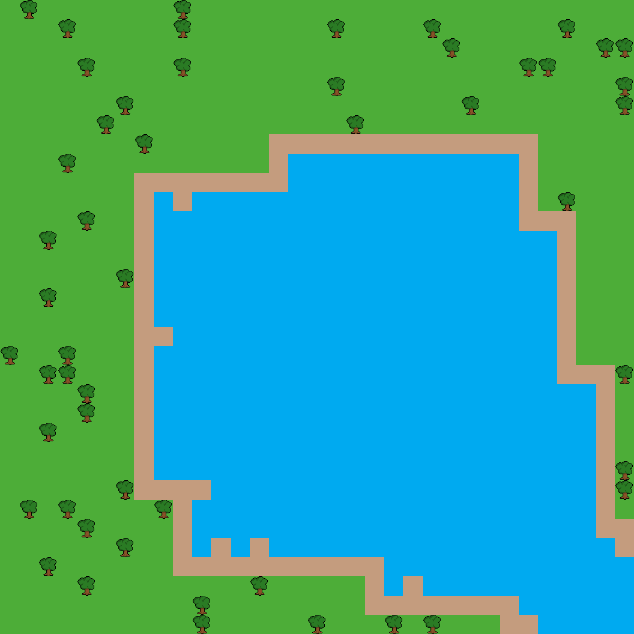
Here’s a visualization of each stage of the cleanup process: before cleanup, cleanup land patches, and cleanup water patches:


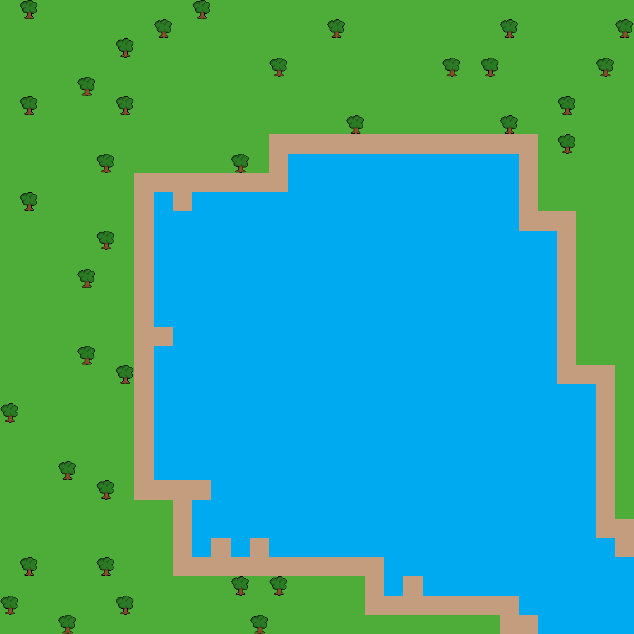
Hmm… it’s a bit better, but we still have those narrow strips jutting in/out of the coast. Let’s change it to replace tiles with less than 2 neighbors of the same type, rather than just 1:


That looks a lot nicer!
Step 4: Decoration Pass
We’re getting a good arrangement of land and water, but it’s looking a bit boring.
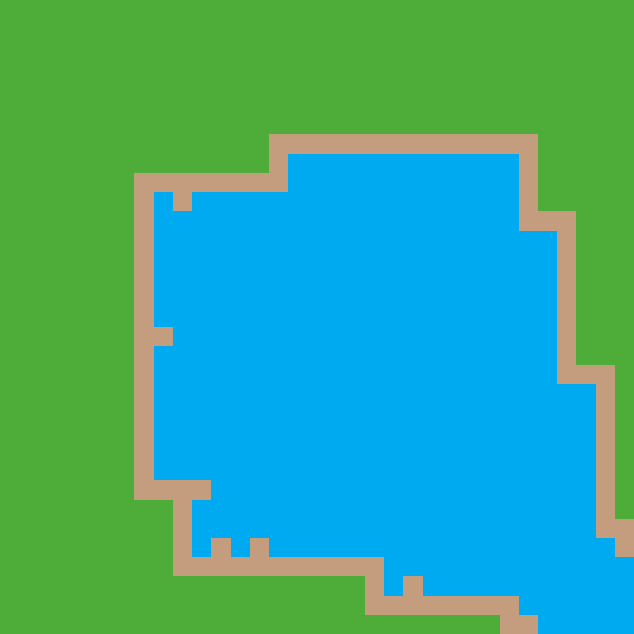
It might look better with some sand along the coast. I’ll find all land tiles touching water and change them to sand:
void TerrainPass::AddSand(TileMap* tilemap)
{
	// Iterate over each row
	for (int y = 0; y < tilemap->size; y++) {
		for (int x = 0; x < tilemap->size; x++) {
			int tile = tilemap->GetTileAt(x, y);

			// Skip if tile isn't specified type
			if (tile != LAND_TILE)
				continue;

			// If land tile is bordering water, change it to sand
			if (HasNeighborsOfType(x, y, tilemap, WATER_TILE)) {
				tilemap->SetTileAt(x, y, SAND_TILE);
			}
		}
	}
}
How about some trees? I could just iterate over the land tiles again, randomly changing them to trees. But I can’t go about it quite like that - the trees have to appear on top of the land tile, rather than replacing it entirely. I’ll have to create a separate tile layer to render on top of this one, and the TMX map format supports just that. So I created a separate Object tile layer, randomly adding trees on top of land tiles (with probability according to some TREE_RATIO):
void TerrainPass::PopulateTrees(TileMap* terrainLayer, TileMap* objectLayer, float treeRatio)
{
	// Iterate over each tile in terrain layer
	for (int y = 0; y < terrainLayer->size; y++) {
		for (int x = 0; x < terrainLayer->size; x++) {
			int tile = terrainLayer->GetTileAt(x, y);

			// Skip if tile isn't specified type
			if (tile != LAND_TILE)
				continue;

			// Randomly place trees on objectLayer based on treeRatio chance
			float chance = rand01();
			if (chance < treeRatio) {
				objectLayer->SetTileAt(x, y, TREE_TILE);
			}
		}
	}
}
Let’s see how it looks:
Looking better! But I don’t really like the clumped distribution of trees. Maybe we should avoid placing trees next to each other.
I would have gone further, but at this point I was running dangerously close to the midnight submission deadline, so I submitted it and called it finished.
This was my favorite project to work on in my Game AI course. It was my first experience with procedural generation, and I know I’ve only scratched the surface of what’s possible. At the time of writing I am quarantined at home due to the coronavirus, so I have a lot of free time. I’ll likely return to this project in a future dev blog!
You can view the code at the repository found here.